In this article, we will discuss creating a Rate Limiter in .Net 7.0. Rate limiting is a common technique used in software development to restrict the number of requests or actions that can be performed within a specific time frame. This can be useful for preventing overload or abuse of a service or resource. In .NET 7, Microsoft has introduced a new package called Microsoft.AspNetCore.RateLimiting provides a built-in middleware for implementing rate limiting in ASP.NET Core applications. The new rate-limiting middleware in .NET 7 allows developers to configure the maximum number of requests that can be made within a specific time window, as well as the duration of that time window. The middleware uses a sliding window algorithm to track the number of requests made by a client and enforces the configured limits. When a client exceeds the limit, the middleware can either return a 429 Too Many Requests HTTP response or delay the request until the limit is reset.
The System.Net.Http.RateLimiting package is used in.NET 7.0 to implement the rate-limiting capability. With the help of this module, developers may set rate limitations for particular endpoints and manage requests that come in at or above the limit. The library offers two classes: RateLimitedHttpClient, which adds rate-limiting functionality to a HttpClient instance, and RateLimiter, which is used to define and set rate restriction rules.
Create an ASP.NET Core 7 Web API project in Visual Studio 2022 :
First off, let’s create an ASP.NET Core 7 project in Visual Studio 2022. We will use here weather forecast template.
The tools which I have used for this project are.
VS 2022 Community Edition
.NET 7.0
Swagger
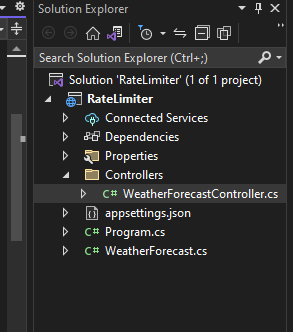
After creating a project this is what our project structure looks like. As you can see in the given below screenshot.
Built-in rate limiting in ASP.NET Core 7:
Rate limiting in ASP.NET Core 7 is available as part of the System.Threading.RateLimiting namespace. The main type is the abstract base class RateLimiter, which has several amazing features.
The maximum number of requests that can be made, the response status code, and the time window are just a few of the configuration choices for RateLimiter. Depending on the HTTP method, the client IP address, and other variables, you can choose the rate limit. Even better, you have the choice to queue requests as opposed to rejecting them. The goal of rate limiting is to ensure that the resources of the web application are used efficiently and that legitimate traffic is not impacted by malicious traffic.
The following rate limiter algorithms are supported:
Fixed window
Sliding window
Token bucket
Concurrency
Fixed window:
Fixed window limit lets you apply limits such as “60 requests per minute”. Every minute, 60 requests can be made. One every second, but also 60 in one go.
Sliding window:
The sliding window limit is similar to the fixed window limit but uses segments for more fine-grained limits. Think “60 requests per minute, with 1 request per second”.
Token bucket:
Token bucket limit lets you control the flow rate and allows for bursts. Think “You are given 100 requests every minute”. If you make all of them over 10 seconds, you’ll have to wait for 1 minute before you are allowed more requests.
Concurrency:
Concurrency limit is the simplest form of rate limiting. It doesn’t look at the time, just at the number of concurrent requests. “Allow 10 concurrent requests”.
So first of all, You must first add the necessary services to the container as described in the code snippet provided below to apply the rate-limiting middleware to your ASP.NET Core 7 application.
builder.Services.AddRateLimiter(options =>
{
//Write your code to configure the middleware here
});
You must invoke the UseRateLimiter extension method as displayed below in order to add the middleware to the pipeline.
app.UseRateLimiter();
Configure rate limiting middleware in ASP.NET Core 7 :
Fixed Window:
Let's make the modifications listed below.
Include the library System.Threading.RateLimiting in Program.cs file.
using System.Threading.RateLimiting;
Then add the below lines of code also in Programs.cs to include the Fixed Window limiter.
//Window Rate Limiter
builder.Services.AddRateLimiter(options => {
options.AddFixedWindowLimiter("Fixed", opt => {
opt.Window = TimeSpan.FromSeconds(3);
opt.PermitLimit = 3;
//opt.QueueLimit = 2;
//opt.QueueProcessingOrder = QueueProcessingOrder.OldestFirst;
});
});
Add the below line of code as well in Program.cs
app.UseRateLimiter();
Now as you can see, The entire code from Program.cs below as we have highlighted them.
using Microsoft.AspNetCore.RateLimiting;
using System.Threading.RateLimiting;
var builder = WebApplication.CreateBuilder(args);
// Add services to the container.
builder.Services.AddControllers();
// Learn more about configuring Swagger/OpenAPI at https://aka.ms/aspnetcore/swashbuckle
builder.Services.AddEndpointsApiExplorer();
builder.Services.AddSwaggerGen();
//Window Rate Limiter
builder.Services.AddRateLimiter(options => {
options.AddFixedWindowLimiter("Fixed", opt => {
opt.Window = TimeSpan.FromSeconds(3);
opt.PermitLimit = 3;
//opt.QueueLimit = 2;
//opt.QueueProcessingOrder = QueueProcessingOrder.OldestFirst;
});
});
var app = builder.Build();
// Configure the HTTP request pipeline.
if (app.Environment.IsDevelopment())
{
app.UseSwagger();
app.UseSwaggerUI();
}
app.UseHttpsRedirection();
app.UseAuthorization();
app.MapControllers();
app.UseRateLimiter();
app.Run();
Now add the below decorator at the WeatherForecastController.cs class- class level.
[EnableRateLimiting("Fixed")]
As you can see the entire code from WeatherForecastController.cs is below as we have added the code and highlighted the implementation.
using Microsoft.AspNetCore.Mvc;
using Microsoft.AspNetCore.RateLimiting;
namespace RateLimiter.Controllers
{
[ApiController]
[Route("[controller]")]
[EnableRateLimiting("Fixed")]
public class WeatherForecastController : ControllerBase
{
private static readonly string[] Summaries = new[]
{
"Freezing", "Bracing", "Chilly", "Cool", "Mild", "Warm", "Balmy", "Hot", "Sweltering", "Scorching"
};
private readonly ILogger<WeatherForecastController> _logger;
public WeatherForecastController(ILogger<WeatherForecastController> logger)
{
_logger = logger;
}
[HttpGet(Name = "GetWeatherForecast")]
public IEnumerable<WeatherForecast> Get()
{
return Enumerable.Range(1, 5).Select(index => new WeatherForecast
{
Date = DateOnly.FromDateTime(DateTime.Now.AddDays(index)),
TemperatureC = Random.Shared.Next(-20, 55),
Summary = Summaries[Random.Shared.Next(Summaries.Length)]
})
.ToArray();
}
}
}
As per the configuration, within 3 seconds, we can raise 3 requests.
Test the API:
To test your API, All you need to do just run your project, and after the successful execution of your project will open the browser into Swagger as we have integrated Swagger into this project.
Running the solution.
Run the solution and open Swagger, and let’s test the endpoint.
Please execute the endpoint four times in a row, the first three requests will access the resource, and the fourth request will be denied because we have the limitation of 3 seconds raising 3 requests.

Types of Rate Limiters in .NET 7.0 :
There are different types of rate-limiting techniques, including:
Concurrency Rate Limiter in .NET:
The number of concurrent requests that can access a resource is limited by a concurrency limiter. If you have a 50 request limit, 50 requests can access a resource simultaneously, and the 51st request won't be handled. When a request is finished, the number of permitted requests increases to 1, then to 2 once the second request is finished, and so on until the count reaches 50.
This algorithm is used to control the async requests. The below code changes will be added to Program.cs file.
//Concurrency Rate Limiter
options.AddConcurrencyLimiter("Concurrency", opt => {
opt.PermitLimit = 10;
opt.QueueLimit = 2;
opt.QueueProcessingOrder = QueueProcessingOrder.OldestFirst;
});
Sliding window Rate Limiter in .NET:
Similar to the fixed window approach, the sliding window algorithm also adds segments. A segment is merely a piece of the window; that is all. Imagine that we have a window of 2 hours, divided into 4 segments of 30 minutes each. The newest segment in the window will be indicated by the current segment index. The current segment will receive the incoming request. The window moves one section every thirty minutes. The request limit is increased by the number of requests from the previous window segment if there were any in the current window segment.
The below needs to be added to Program.cs file.
//Sliding Window Rate Limiter
options.AddSlidingWindowLimiter("Sliding", opt => {
opt.Window = TimeSpan.FromSeconds(10);
opt.PermitLimit = 4;
opt.QueueLimit = 2;
opt.QueueProcessingOrder = QueueProcessingOrder.OldestFirst;
opt.SegmentsPerWindow = 2;
});
Token bucket Rate Limiter in .NET:
Based on a predetermined number of permitted queries, this method restricts the number of requests. Take our hypothetical application with a bucket as an example. Ten tokens can fit in this bucket, and two tokens are added to it every two minutes. When a user submits a request, a token is required, leaving us with 9. We now have 6 tokens after 3 additional requests, each of which takes 1 token. We receive two additional tokens after two minutes have gone. The bucket now contains 8 tokens. The remaining tokens are taken by 8 requests, leaving 0 tokens in the bucket. If another comes, it is not allowed to access the resource until the bucket fills with tokens.
The below code goes into Program.cs file.
//Token Bucket Rate Limiter
options.AddTokenBucketLimiter("Token", opt => {
opt.TokenLimit = 4;
opt.QueueLimit = 2;
opt.QueueProcessingOrder = QueueProcessingOrder.OldestFirst;
opt.ReplenishmentPeriod = TimeSpan.FromSeconds(10);
opt.TokensPerPeriod = 4;
opt.AutoReplenishment = true;
});
Benefits of using Rate Limiting in .NET 7.0 :
In .NET 7, there are several benefits to using a rate limiter, including:
Preventing abuse: By limiting the number of requests a client can make, you can prevent malicious users from overwhelming your API with too many requests.
Reducing server load: By limiting the number of requests a client can make, you can reduce the load on your server, which can improve the overall performance of your application.
Improving reliability: By limiting the number of requests a client can make, you can reduce the risk of your server becoming overloaded, which can lead to crashes or other issues.
Enforcing fair usage: By limiting the number of requests a client can make, you can ensure that all users have a fair chance to use your API, rather than allowing one user to monopolize resources.
Conclusion:
In .NET 7, a new rate limiter middleware has been introduced in the ASP.NET Core framework, which helps to limit the number of requests processed by an application over a specified period of time. The rate limiter middleware is implemented as a NuGet package called Microsoft.AspNetCore.RateLimiting. Overall, the rate limiter middleware in .NET 7 provides an easy-to-use and configurable way to limit the impact of clients making excessive requests to your application.
Hope you enjoyed reading this article and found it useful. Please share your thoughts and recommendations in the comment section below.
Share This Post
Support Me